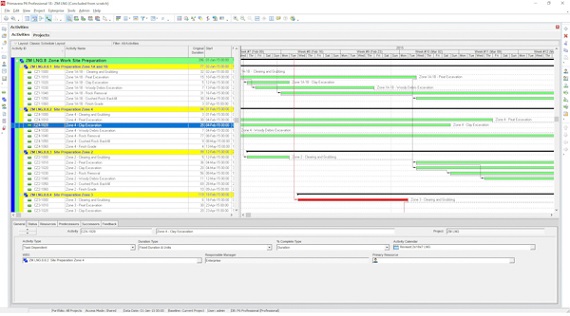
In part one we explained workspace basics using the main window, start page setup, hint help, and the structure of the user interface windows, the command and toolbars, show on top and bottom, and display window details.
Status bar is a message bar in the bottom of the window that displays information, include the name of current portfolio, access mode, data date, current baseline, current login username, and database alias and type which is here Professional, most windows has layout display options bar we can make open save or save as or we can open filter by all or currently open or checked out or status they display number of commands that enable us to customize the current display toolbars as we said before they are here, here, here, and here let us have now a closer look on how to customize toolbars, right click on any area in toolbars we’ll see a list of toolbars in P6 we can show or hide by check or uncheck any toolbar in the open list the active toolbars are checked ones as you can see unchecking the project toolbar will make it disappear check it and it’s in place once again
Let us try the -Assign Toolbar- uncheck and it disappears from the list check and it’s back to place and the same to all toolbars note that buttons shown on toolbars are either active or inactive their status changes according to the active open window see the changing open window tab change active buttons on toolbars
To show or hide buttons on toolbars we click on those small arrows which are on the side of toolbars there is one on each toolbar once we click it we will have -Add Remove Buttons- click on it, it will show the list of buttons on this toolbar once again the checked ones are the active shown buttons check or uncheck to show or hide the button, in the bottom of the list there is -Reset Toolbar- clicking it will reset the toolbar to the default shown on buttons also in the bottom there is -Customize- clicking it will open customize dialog box with the three tabs: Toolbars which is another way to show or hide toolbars by checking or unchecking comments to show comments on each category: file- edit- or view-… once the customized dialog is open you can edit, arrange, delete, and customize comments in the menus like here I’m moving the project command in the Enterprise menu putting it back also once customize is open you can move buttons on in the tool bars or between them hold by the mouse and move, put back in place we can lock or unlock toolbars from view when not locked we can move toolbars by hovering the mouse over the dotted line then grab it and move it, if things get messy we always can open view and reset toolbars to default locations
Now we will have quick look on setting user preferences which we will go in more details when we set up our first project, to open -User Preferences- go to Edit then choose User Preferences first step is to define how to display time information in second tab we can specify a format for dates
in the third tab we select a currency view, in the fourth tab the assistance we choose to use or not to use resource and activity Wizards, in the next step we set Startup options, set group and sorting, define how to display codes, and columns, in the next tab we can change the user password to log in to the Primavera P6, in the next Tab: -Resource Analysis- we can load resource summary data at start up for which projects, in the next Tab -Calculations- we select calculation options for resource and role assignments, in the last Tab we select Startup filters,
Thank you for watching this video if you liked it please hit like and subscribe to my channel as more contents will be added to this series if you have any suggestions or questions please leave them in the comments section below and I promise to respond, thanks again for watching until next time.


