Hello everyone welcome to my channel scheduling advisor, in this video we will talk about Primavera p6 Professional User Interface, let us start, find Primavera P6 version 20 in our start menu, double click to open, sign in, enter password, and connect
Once we reached the main window I would like to explain here how to set up the application start up window to make sure that every time you sign in, you reach the same window, let us go to Edit
Then choose -User Preferences- choose -application- tab then you can choose the application start up window I prefer to choose -Projects- once you choose it now we know that we will come to project window every time we open P6 application, you can also check -Show the welcome dialogue at Startup- box to see welcome window installed if you like but I prefer the Project window to open each time we open the p6 application let us hit close and explain the p6 main window it consists of Command Area and Toolbars
also we have the Top Part and the Bottom Part
there are 11 main windows in P6 Professional, you can open as many windows as necessary each open window displays as a tab below the active tab title bar which is just below toolbar area to navigate between open windows, click the appropriate tab to close a window close the x to the right on the active tab title bar, remember that you can open the window either from toolbar or command bar
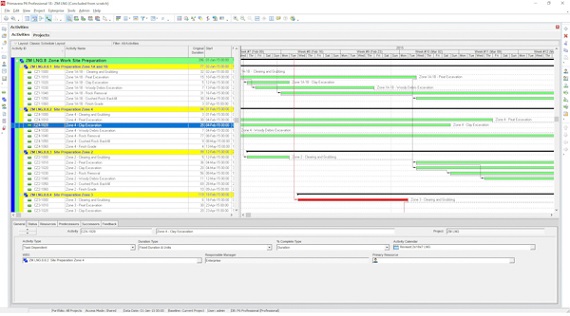
Four of the windows are Global Enterprise Data Windows, they are: projects, resources, reports, tracking, and the remaining windows are Project Specific Data Windows, which display project level data they are work Breakdown Structure WBS, activities, resource, assignments, work products and documents window, project expenses, window project thresholds window, project issues window, and when we are connected to P6 Professional database we have a 12 window which is Risk View
to enable or disable -Hint help- open View and go to Hint help, now as you can see hovering the mouse over the toolbar icons will show us the toolbars button’s id
to display the details for a window such as Projects or Activities we choose view -Show on top- then we can choose either table or Gantt chart or chart view we can do the same from the toolbars by clicking different buttons also we can open View -Show on bottom- either to put the -Details- or -no bottom- layout the same we can do the same like in view from the toolbar. thank you for watching part one of this video if you liked it please hit like and subscribe to my channel as more contents will be added to this series if you have any suggestions or questions please leave them in the comments section below and i promise to respond thanks again for watching until next time